24th May 2023
How To Use OEM Printers?
OEM printers are Original Equipment Manufacturer printers, which means they are made by the same company that created your computer or another device. To use an OEM printer, you will need to follow a few basic steps:
- Connect the printer to your computer: Use the USB or Ethernet cable that came with the printer to connect it to your computer. Some newer printers may also offer wireless connectivity options such as Wi-Fi or Bluetooth.
- Install the printer driver: Your computer needs a printer driver to communicate with the printer. Insert the installation CD that came with the printer or download the driver from the printer manufacturer's website.
- Configure the printer settings: Once the printer driver is installed, you may need to configure some settings, such as paper size, orientation, and quality. You can usually do this through the printer properties or settings menu on your computer.
- Test the printer: After you have connected the printer, installed the driver, and configured the settings, you should print a test page to make sure everything is working correctly.
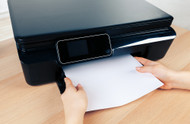
- Use the printer: Once you have completed these steps, you can start using the printer to print documents, photos, and other materials. Remember to keep the printer driver up to date to ensure optimal performance.


